


Made to Measure Curtains - Newcombe Ice White
Dispatched in 13 Working Days
- Description
- Information
- Reviews
- Child Safety & Control Lengths
- Questions?
- Measuring Guide
- Fitting Guide
- Aftercare
Description
- Min Width: 640mm Max Width: 6000mm
- Min Drop: 300mm Max Drop: 3500mm
- Fabric Composition: 46% Cotton / 54% Polyester
- Guarantee: 12 months
- Fabric Lining: Fully lined as standard, blackout and thermal lining available.
- Fullness: All headings are supplied with double fullness except pinch pleat which is one and three quarter width fullness.
- Finish: Supplied with mitred corners for a neat finish and bottom weights.
- Available as a pair or single curtains.
Additional information
| Colour | White |
|---|---|
| Feature | Plain / Textured |
Reviews can only be left by verified customers using the personal link in their review invitation email.
Child Safety & Control Lengths
 We want to keep you and your family safe. This is why all of the blinds we supply are manufactured to comply with the latest child safety regulations. Child safety devices will automatically be included with your blind when required to ensure your blind is child safe. Control lengths will also be set to industry standards. If specific control lengths are required, please get in touch before ordering, and we'll do our best to accommodate. Click here to view further details.
Questions
There are no questions yet. Be the first to ask a question about this product.
Measuring Guide
Getting the correct size for your new curtains is easy with our simple-to-follow guide.
Measuring the Width
To get the correct width measure the curtain track (fig 1) or pole (fig 2) (excluding finials) and not the window. If a new track or pole is to be fitted, we recommend extending approximately 150mm past the window on both sides and 150mm above the window.
If your curtain track has an overlap (fig 3), take a measurement of the track width and add this to the overlap to get the correct total width (A plus B).
If wave heading is selected ensure the curtains will be fitted to a wave track with gliders spaced at 80mm.
Measuring the Drop
For pencil and pinch pleat curtains which are to be fitted to a curtain track measure from the top of the track (fig 4) to the finished curtain drop. For pencil and pinch pleat curtains which are to be fitted to a curtain pole (fig 5) measure from the bottom of the pole ring eyelet to the finished curtain drop.
Eyelet heading curtains are suitable for poles 28mm in diameter and the centre of the eyelet has a diameter of 40mm. Measure from the top of the curtain pole (fig 6) to the finished curtain drop and add 40mm to this measurement to allow for the material above the eyelets.
For wave curtains measure from the bottom of the track profile (fig 7) to the finished curtain drop.
We recommend allowing 15mm between the bottom of the curtain and the floor, window sill or radiator.
Please note, if fitting eyelet curtains to a wooden pole the eyelets may scratch the pole.
Fig 1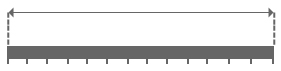
Fig 2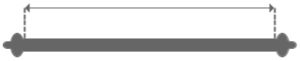
Fig 3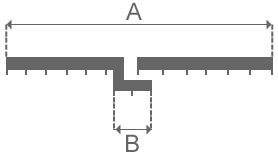
Fig 4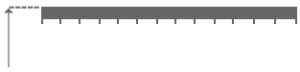
Fig 5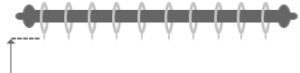
Fig 6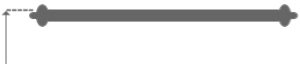
Fig 7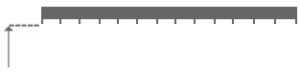
Fitting Guide
Hanging your new curtains is easy with our simple-to-follow guide.
Pencil Pleat Curtains
Identify the left and right hand curtains ensuring that the join in the curtains is on the outer edge (fig 1). Tie the header tape cords on the inner edge of the curtain and pull the header tape cords from the outer edge evenly to create the pleats. Tie the header tape cords on the outer edge and secure behind the header tape, do not cut the header tape cords.
Insert the hooks evenly along the header tape. If fitting to a curtain track use the middle or bottom pencil pleat tape (fig 2 B or C), if fitting to a curtain pole use the top pencil pleat tape (fig 2 A). Once both curtains have been gathered and hooks inserted, your curtains are ready to hang.
Pinch Pleat Curtains
Identify the left and right hand curtains ensuring that the join in the curtains is on the outer edge (fig 1). Pinch Pleat curtains will arrive with stab hooks already in position for fitting to a pole. If fitting to a track, you will need to re-align the hooks. Identify where the stab hooks need to be positioned so that the track is covered by the curtain, usually 9cm from the top of the curtain (fig 3). Ensure the stab hooks do not go through the face of the fabric when re-positioning. Your curtains are now ready to hang.
Eyelet Curtains
Identify the left and right hand curtains ensuring that the join in the curtains is on the outer edge (fig 1). Eyelet curtains are supplied and secured into pleats. Simply slide each curtain onto the pole ensuring the last eyelet is between the finial and the first bracket securing the pole.
.
Fig 1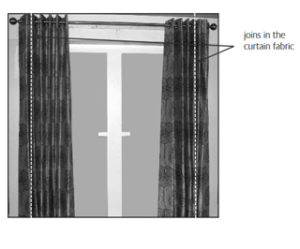
Fig 2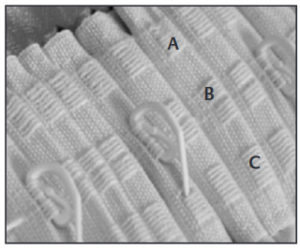
Fig 3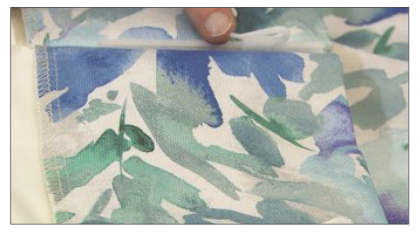
Aftercare
Curtains should be regularly vacuumed using an upholstery attachment to prevent dust from being embedded into the fabric.
When curtains require cleaning, they should be dry cleaned in accordance with the care label. Remove any hooks and keep them safe. The plastic ratcheted sections sewn into the pinch pleat header cannot be removed. Pencil pleat draw-cords need to be loosened so that the pleats can be flattened, but the cords should not be cut.
Matching items or multiple pairs of curtains in the same fabric should be cleaned at the same time. Be advised that you should allow for up to 3% shrinkage at the first dry clean.





Reviews
There are no reviews yet.